


Looking for a simple exercise that can strengthen your legs, improve muscular endurance, and support your overall fitness without expensive gym equipment? The wall sit exercise might be exactly what you need.
Wall sits are a popular bodyweight exercise that can be performed almost anywhere. Whether you work out at home, exercise at the gym, or want to add a quick strength-training movement to your daily routine, this exercise is easy to learn and requires nothing more than a sturdy wall.
In this complete guide, you’ll discover wall sit benefits, muscles worked, proper exercise techniques, beginner-friendly variations, and a four-week workout plan.
What Is a Wall Sit Exercise?
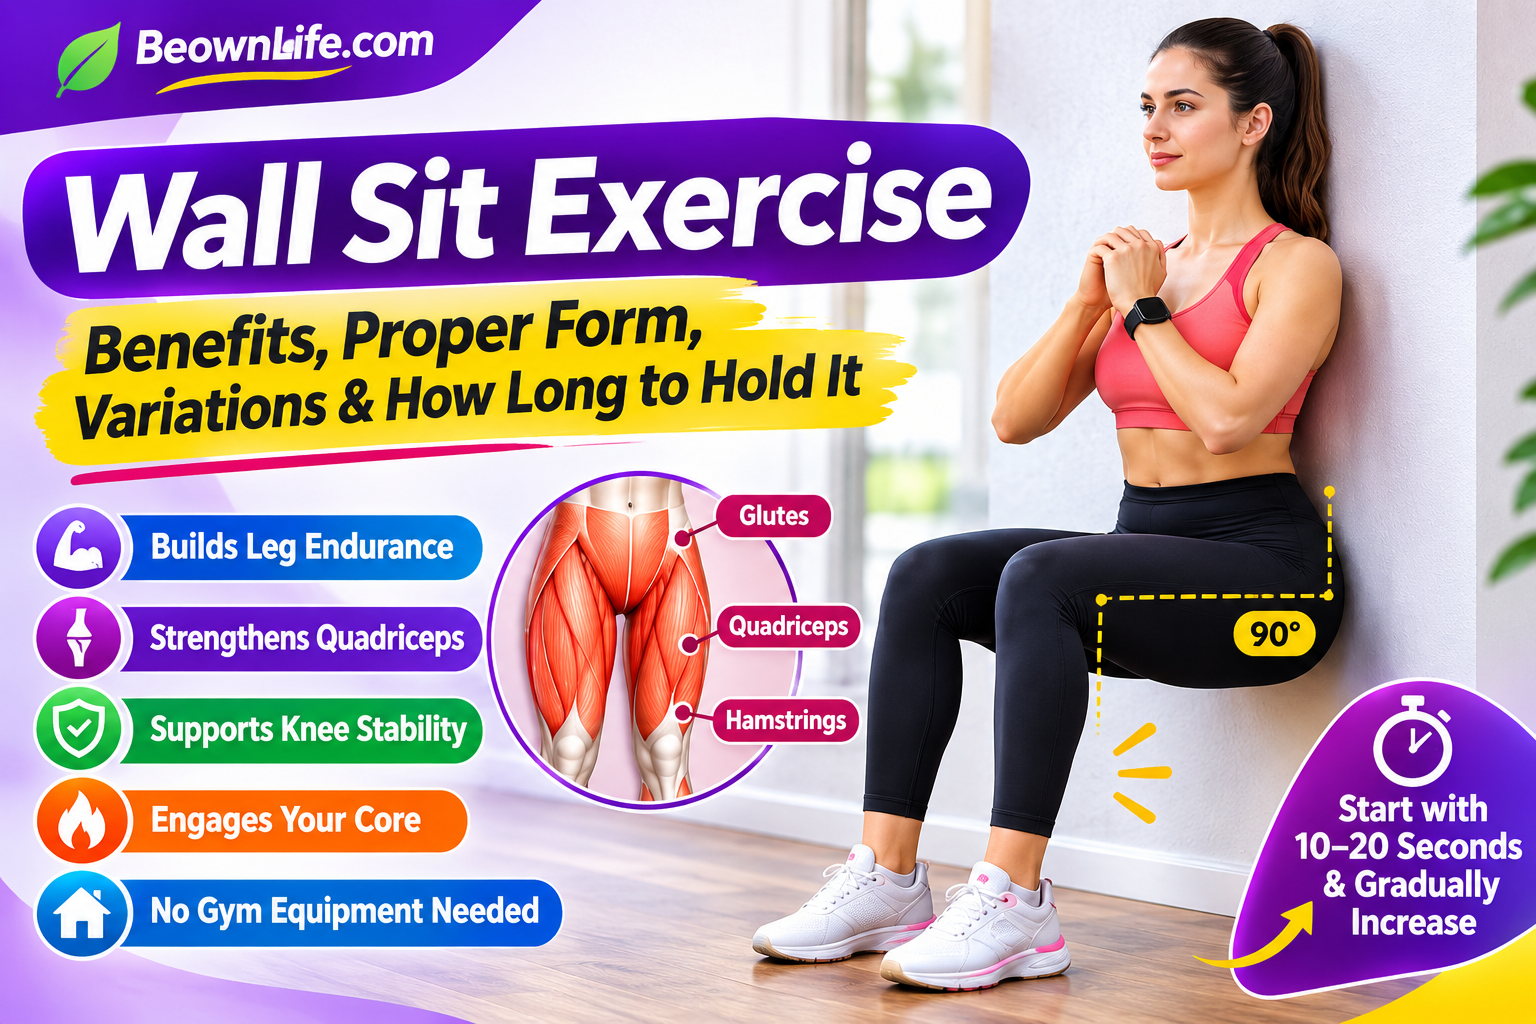
A wall sit is an isometric lower-body exercise in which you lean your back against a wall and lower your body into a seated position, as if sitting on an invisible chair.
The word isometric describes a type of muscle contraction in which muscles generate tension without noticeably changing length or producing joint movement.
Instead of repeatedly moving up and down like a traditional squat, you hold one position for a specific amount of time.
Which Muscles Do Wall Sits Work?
Wall sits primarily target your lower-body muscles. Several muscle groups work together to help you maintain a stable position.
🦵 Quadriceps
The front thigh muscles do most of the work during a wall sit, helping maintain the bent-knee position.
🍑 Glutes
Your glute muscles help stabilize your hips and support your lower-body position.
💪 Hamstrings
The muscles at the back of your thighs contribute to lower-body stability.
🦶 Calves
Your calf muscles help stabilize your lower legs while your feet remain on the floor.
🔥 Core Muscles
Your abdominal and trunk muscles help maintain a stable upper-body position.
Top 8 Benefits of Wall Sit Exercises
💪 1. Builds Leg Endurance
Wall sits challenge your muscles to maintain tension, helping develop lower-body muscular endurance.
🦵 2. Strengthens Quadriceps
They place significant demands on the front thigh muscles and complement traditional leg exercises.
🏃 3. Supports Knee Stability
Strengthening the quadriceps and surrounding muscles can contribute to better lower-body control.
🎯 4. Improves Squat Endurance
Holding a squat-like position helps develop muscular endurance at specific joint angles.
🔥 5. Engages Your Core
Your abdominal and trunk muscles help maintain posture and upper-body stability.
🏠 6. No Gym Equipment
You only need a sturdy wall and enough space to position your feet.
⭐ 7. Beginner Friendly
You can adjust the squat depth and holding time according to your fitness level.
❤️ 8. May Support Healthy Blood Pressure
Research suggests structured isometric training may help improve resting blood pressure in some adults.
How to Do a Wall Sit Correctly: Step-by-Step
Follow these instructions to perform a standard wall sit with proper technique.
Step 1: Find a Suitable Wall
Choose a sturdy, flat wall with enough open floor space. Make sure the floor is not slippery.
Step 2: Position Your Back Against the Wall
Stand with your back flat against the wall. Keep your feet approximately hip-width apart.
Step 3: Move Your Feet Forward
Walk your feet forward approximately 1.5 to 2 feet. Adjust the distance according to your height and comfort.
Step 4: Slide Down Slowly
Bend your knees and slide your back down the wall into a comfortable squat position. Aim for approximately 90-degree knee bends if comfortable.
Step 5: Check Your Knee Position
Keep your knees generally aligned with your ankles and pointing in the same direction as your toes.
Step 6: Engage Your Core
Keep your back supported against the wall, your abdomen gently engaged, and your shoulders relaxed.
Step 7: Hold the Position
Maintain your position for 10 to 60 seconds depending on your fitness level. Continue breathing normally.
Step 8: Return to Standing
Slowly push through your feet and slide up the wall until you are standing.
How Long Should You Hold a Wall Sit?
Your ideal wall sit duration depends on your fitness level, strength, and exercise goals.
| Fitness Level | Hold Duration | Sets | Rest |
|---|---|---|---|
| Beginner | 10–20 seconds | 2 | 60–90 sec |
| Intermediate | 20–40 seconds | 2–3 | 60–90 sec |
| Advanced | 40–60 seconds | 3 | 60–120 sec |
Wall Sit Variations to Challenge Your Muscles
1. Beginner Wall Sit
Start with a shallow squat instead of lowering your thighs parallel to the floor. Hold for 10–15 seconds and gradually progress.
2. Standard 90-Degree Wall Sit
Lower your body until your thighs are approximately parallel to the floor, if comfortable. Hold for 20–60 seconds.
3. Wall Sit With a Stability Ball
Place a stability ball between your back and the wall. Slowly lower your body while allowing the ball to roll with your movement.
4. Wall Sit With a Medicine Ball
Hold a lightweight medicine ball close to your chest while maintaining your wall sit position.
5. Wall Sit With Heel Raises
While maintaining your wall sit, slowly lift both heels off the floor and lower them with control. Repeat 8–12 times.
6. Single-Leg Wall Sit
For an advanced challenge, carefully lift one foot while maintaining a stable position. Switch legs after a short hold. Only attempt this after mastering standard wall sits.
Common Wall Sit Mistakes to Avoid
❌ Feet Too Close
Move your feet forward until you can maintain a comfortable, stable position.
❌ Knees Collapsing Inward
Keep your knees aligned with the direction of your toes.
❌ Holding Your Breath
Breathe normally throughout the entire exercise.
❌ Lowering Too Quickly
Move slowly and use a comfortable squat depth.
❌ Holding Too Long
Stop when fatigue affects your exercise technique.
How Often Should You Do Wall Sits?
For most healthy beginners, performing wall sits two or three times per week is a reasonable starting point.
- Include them in a lower-body strength workout.
- Use them as a finishing exercise after leg training.
- Add them to a bodyweight circuit.
- Allow sufficient recovery between challenging sessions.
A Simple 4-Week Wall Sit Workout Plan
Use this beginner-friendly progression to gradually improve your muscular endurance.
| Week | Hold Duration | Sets | Frequency |
|---|---|---|---|
| Week 1 | 10–15 sec | 2 | 2 days/week |
| Week 2 | 15–20 sec | 2 | 2–3 days/week |
| Week 3 | 20–30 sec | 2–3 | 3 days/week |
| Week 4 | 30–40 sec | 3 | 3 days/week |
Can Wall Sits Help With Weight Loss?
Wall sits can contribute to a broader fitness program, but they are not a standalone weight-loss solution.
They use energy and challenge your muscles, but generally burn fewer calories than activities such as brisk walking, jogging, swimming, and cycling.
If your goal is to lose body fat, combine wall sits with:
- Regular cardiovascular exercise.
- Full-body strength training.
- A balanced eating plan.
- A sustainable calorie deficit.
- Consistent sleep and recovery.
Who Should Be Careful When Performing Wall Sits?
Wall sits are accessible to many people, but they are not suitable for everyone in every situation.
Consider medical guidance before starting if you have:
- Uncontrolled high blood pressure.
- Significant cardiovascular disease.
- A recent knee, hip, or back injury.
- Persistent joint pain.
- Balance problems.
- A medical condition that limits physical activity.
Frequently Asked Questions About Wall Sit Exercises
1. Are wall sits effective for building leg strength?
Yes. Wall sits help develop lower-body isometric strength and muscular endurance, particularly in the quadriceps. They work best alongside other strength exercises.
2. How long should a beginner hold a wall sit?
Beginners can start with 10–20 seconds per set and gradually progress toward 30–60 seconds while maintaining proper form.
3. Do wall sits help strengthen the knees?
They strengthen the quadriceps and surrounding muscles, which support knee function. However, they are not appropriate for every knee condition.
4. Can I do wall sits every day?
For most beginners, two or three sessions per week are a practical starting point. Allow adequate recovery after challenging workouts.
5. Do wall sits build bigger thighs?
They can improve thigh strength and endurance. For significant muscle growth, include progressive resistance exercises such as squats, lunges, and leg presses.
6. Are wall sits better than squats?
Neither exercise is universally better. Wall sits develop isometric strength, while squats train muscles through a range of motion. Both can complement each other.
7. Can I do wall sits at home without equipment?
Absolutely. You only need a sturdy wall and a safe, nonslip floor.
8. Why do my legs shake during wall sits?
Leg shaking can occur when your muscles become fatigued. If it becomes excessive or you experience pain or dizziness, stop the exercise.
Final Thoughts: Make Wall Sits Part of Your Fitness Routine
The wall sit is a simple but challenging bodyweight exercise that can help improve lower-body muscular endurance, strengthen your quadriceps, and develop better control in a squat-like position.
One of its biggest advantages is convenience. You can perform wall sits at home, at the gym, or almost anywhere with a sturdy wall. No expensive equipment or complicated workout setup is necessary.
For the best results, start with short holding periods, focus on proper technique, and gradually increase the challenge as your fitness improves.
Combine wall sits with squats, lunges, walking, and other exercises to build a more complete fitness routine.
Remember: Successful fitness training is not about how long you can hold a difficult position on your first day. It is about building strength safely, staying consistent, and making gradual progress over time.
Start with a few seconds today, stay consistent, and give your body time to improve!
References and Further Reading
Medical Disclaimer: This article is for educational and informational purposes only. It is not a substitute for professional medical advice, diagnosis, or treatment. Consult a qualified healthcare professional before beginning a new exercise program if you have an existing medical condition or concerns about exercise safety.

